First, choose the printer you’d like to install and make note of its name & model – you’ll need them later:
| Name | IP Address | Floor | Location | Type | Model |
|---|---|---|---|---|---|
| akutagawa.cic.com | 74.116.34.68 | 15 | 15th Floor, Beni side | B/W | Sharp MX M6071 |
| basho.cic.com | 74.116.34.69 | 15 | 15th Floor, Beni side | Color | Sharp MX 3661 |
| ichiyo.cic.com | 74.116.34.71 | 15 | 15th Floor, Ichigo side | Color | Sharp MX 3661 |
| kawabata.cic.com | 74.116.34.70 | 15 | 15th Floor, Ichigo side | B/W | Sharp MX M6071 |
| murasakishikibu.cic.com | 74.116.34.72 | 16 | 16th Floor, Wellness side | B/W | Sharp MX M6071 |
| seishonagon.cic.com | 74.116.34.73 | 16 | 16th Floor, Wellness side | Color | Sharp MX 3661 |
| soseki.cic.com | 74.116.34.75 | 16 | 16th Floor, Sakura side | Color | Sharp MX 3661 |
| yosano.cic.com | 74.116.34.74 | 16 | 16th Floor, Sakura side | B/W | Sharp MX M6071 |
Installation guide:
Please select your operating system:
Windows instructions:
These directions are designed for Windows 10 users, but the directions should work for other versions of windows as well with very little variation.
Step 1.
Click here to download the drivers. You will be redirected to Sharp website. Choose the right operating system for you. If you’re not sure about it, go to Start -> Settings -> System -> About to verify.
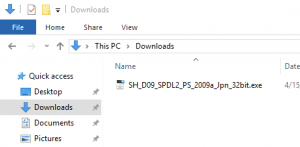
Double click the downloaded .exe file.
Confirm opening the file if necessary.
Step 2.
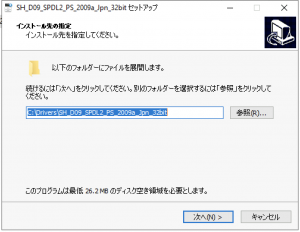
Click Next to unzip the driver and run the setup.
Step 3.
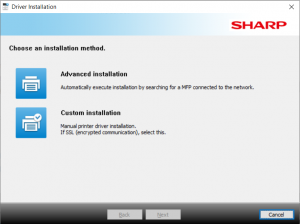
Choose “Custom installation”.
Step 4.
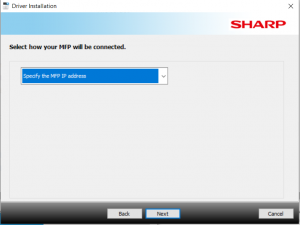
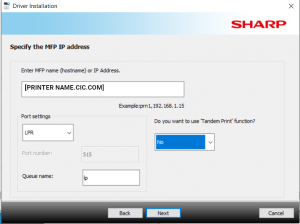
Choose “Specify the MFP IP address” from the drop-down list.
Step 5.
Enter the printer name (see top of this page) into the “Enter MFP name…” field.
Change port settings to LPR. Leave the queue name unchanged.
Say “No” to the “Tandem Print” function.
Click “Next” to continue.
Step 6.
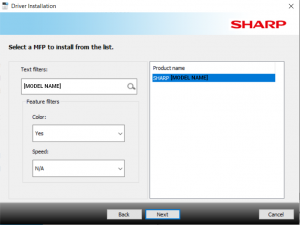
Choose the right printer model from the list (see top of this page).
You can use the text filter to find the right model faster.
Choose if the printer you’re installing is a color one or not.
Leave the Speed field unchanged.
Click “Next” to continue.
Step 7.
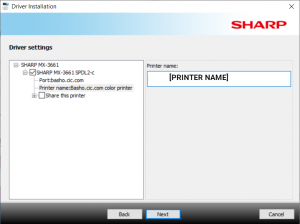
Review all the settings. If you want, you can change the “Printer name” field from the generic one to something more memorable.
Printer sharing is not recommended at CIC.
Click “Next” to continue.
Step 8.
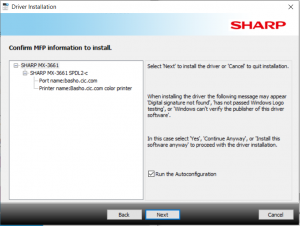
Check the “Run the Autoconfiguration” box.
Click “Next” to continue.
Step 9.
Choose “Install” to install the Sharp printer driver.
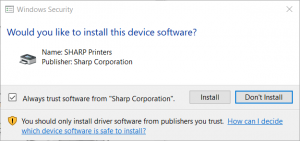
Step 10.
Wait while the installer is setting up your new device.

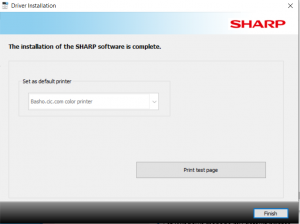
Step 11.
If you want, you can set this printer as default.
Click “Finish” and enjoy!
Click here if you want to learn how to use the Secure Print feature.
As always don’t hesitate to ask for help at your local CIC team office.
MacOS instructions:
These directions are designed for MacOS Catalina users, but the directions should work for other versions of MacOS (OSX) as well with very little variation.
Step 1.
Click here to download the drivers for MacOS. You will be redirected to Sharp website. Choose the right operating system for you. If you’re not sure about it, check the About this Mac menu (Apple icon usually in the top-left corner of your screen).
Double click the downloaded .dmg file.
Then double click the .pkg file.
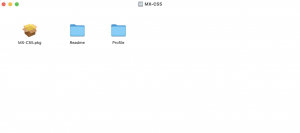
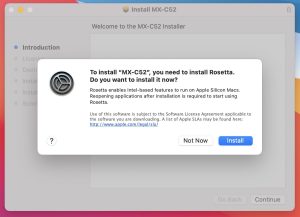
On MacBooks with the M1 chip you may be asked to install the Rosetta compatibility package. Click Install.
Step 2.
Click “Continue.”
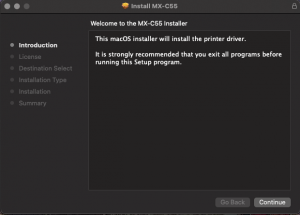
Step 3.
Click “Continue.”
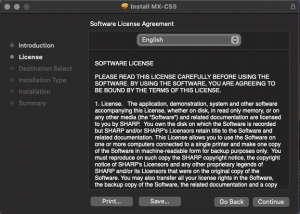
Step 4.
Click “Agree.”
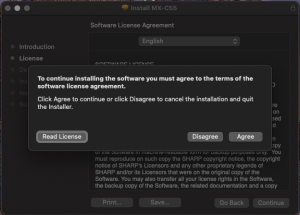
Step 5.
Click “Install.”
You may be asked for your password.
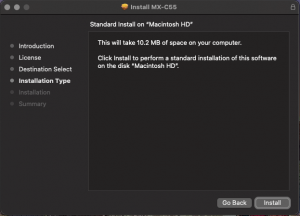
Step 6.
Click “Close.”
If the installer asks about deleting the downloaded file, it’s safe to agree.
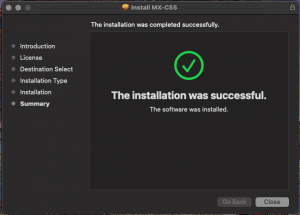
Step 7.
Open your System Preferences.
Click: “Printers and Scanners.”
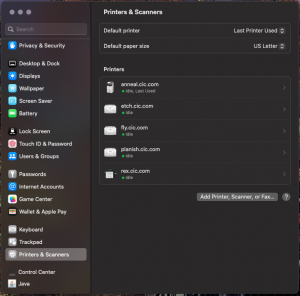
Step 8.
On the Printers and Scanners page click the “+” to add a printer.
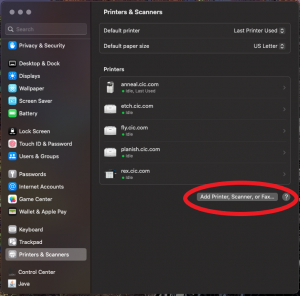
Step 9.
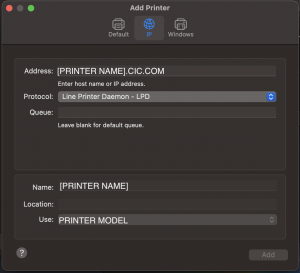
On the top of the Add page click the IP Tab.
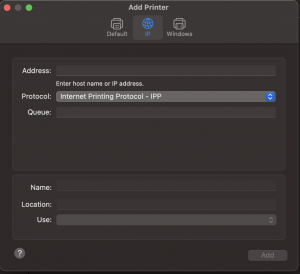
Step 10.
Type the printer name (see top of the page) in the Address field.
Click the Protocol drop down and select Line Printer Daemon – LPD.
The Printer Name should autofill. If not, repeat the printer name.
The Printer Model should also autofill in the Use field.
Step 11.
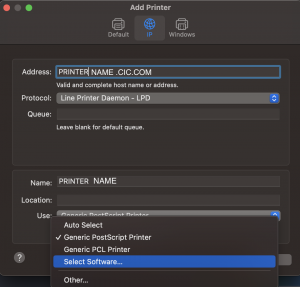
If the Use field has the Printer Model autofilled, skip to Step 13!
If it has not autofilled, click the drop down and select “Select Software…”
Step 12.
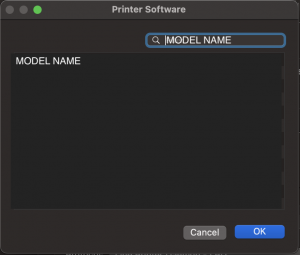
On the Printer Software page type the printer model (see top of the page).
Select “[Model] PPD”
Step 13.
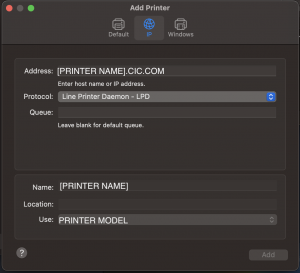
If you like change the name to something memorable.
Click: “Add.”
Step 14.
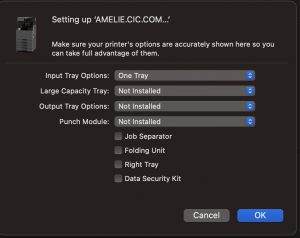
Make no changes.
Click “OK” and Enjoy.
Click here if you want to learn how to use the Secure Print feature.
As always don’t hesitate to ask for help at your local CIC team office.
