First, choose the printer you’d like to install and make note of its name & model – you’ll need them later:
| Name | IP Address | Floor | Location | Type | Model |
|---|---|---|---|---|---|
| mississippi.cic.com | 65.254.97.69 | 2 | 4240 Duncan Ave | B/W | HP LaserJet 600 |
| stevie.cic.com | 65.254.97.75 | 3 | 20 Sarah Street, 3rd Floor, building 2 | B/W | HP LaserJet M605 |
Installation guide:
Please select your operating system:
Windows instructions:
These directions are designed for windows 7 & 8 users, but the directions should work for other versions of windows as well with very little variation.
Step 1.
Windows has drivers for this printer built in so there is no need to download anything.
Open the control panel.
Click: “View devices and printers.”
On the devices and printers page click the: “Add a printer button.”
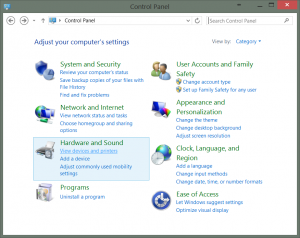
Step 2.
After Windows tries to find printers
Click: “The printer that I want isn’t listed”
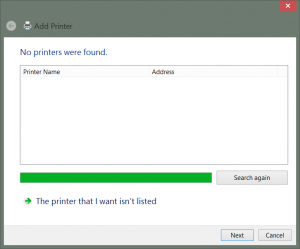
Step 3.
Click the radio button next to:
“Add a local printer or network printer with manual settings.”
Click: “Next.”
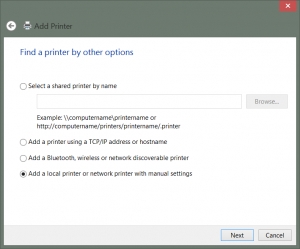
Step 4.
Click the radio button next to: “Create a new port.”
Under the: “Type of port” drop down menu select: “Standard TCP/IP Port.”
Click: “Next.”
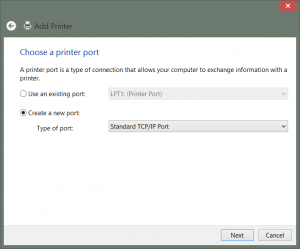
Step 5.
In the Hostname or IP address field enter the printer name (see top of the page).
The Port name should autofill.
Click: “Next.”
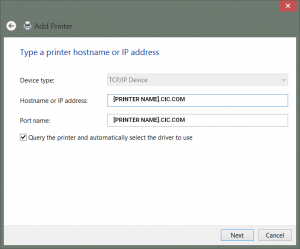
Step 6.
Under the: Standard drop down menu
select “Hewlett Packard Jet Direct.”
Click: “Next.”
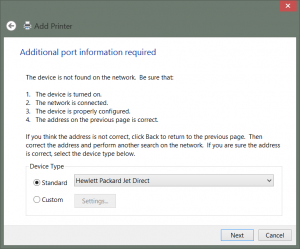
Step 7.
Wait for Windows to try to auto detect the drivers.
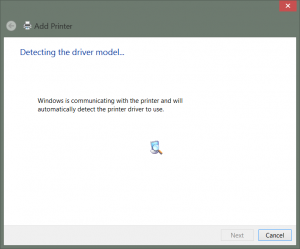
Step 8.
If Windows did not auto detect the drivers you will need to select it from the list.
In the left window scroll down and select “HP.”
Then in the right windows find
“HP Laserjet [PRINTER MODEL] PCL6.”
(See the printer model at the top of the page.)
If the driver is not listed in the right windows:
Click: “Windows Updates,”
wait for Windows to finnish.
The driver should now be listed.
Click: “Next.”
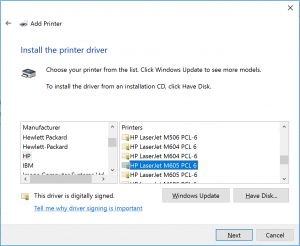
Step 9.
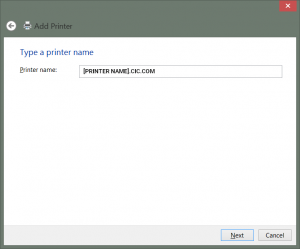
Now you can name the printer.
The name can be whatever you like,
however we recommend using a name that will remind you where the printer is.
Click: “Next.”
Step 10.
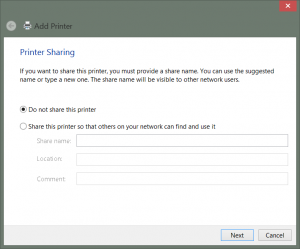
Click the radio button next to:
“Do not share this printer.”
Click: “Next.”
Step 11.
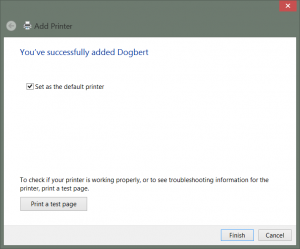
If you would like to use this printer as your default printer then leave the box checked.
If you would like to print a test page click that button.
Otherwise Click: “Finish.”
and Enjoy.
As always don’t hesitate to ask for help at your local CIC team office.
MacOS instructions:
These directions are designed for Mac OSX 10.9 users, but the directions should work for other versions of Mac OS (OSX) as well with very little variation.
Step 1.
OSX has drivers for this printer built in so there is no need to download anything.
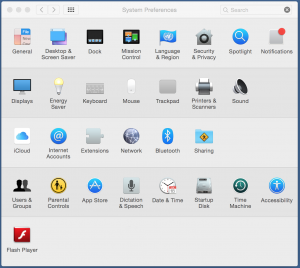
Open your System Preferences.
Click: “Printers & Scanners.”
Step 2.
On the Printers & Scanners page
Click the “+” to add a printer.
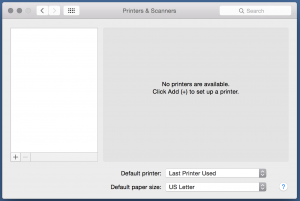
Step 3.
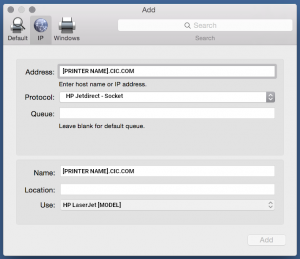
On the top of the Add page
Click the IP Tab.
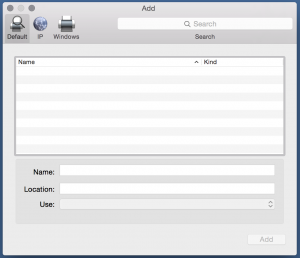
Step 4.
Type [PRINTER NAME].cic.com in the Address field. (See top of the page).
Click the Protocol drop down
and select HP Jetdirect – Socket.
The name should autofill.
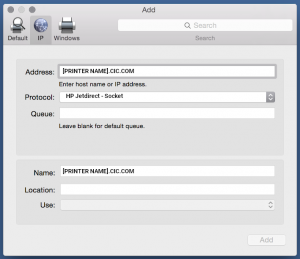
Step 5.
Click the Use drop down
and select “Select Software…”
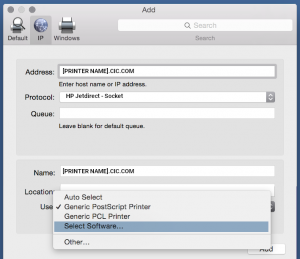
Step 6.
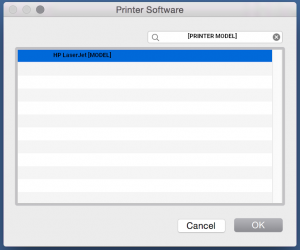
On the Printer Software page type “HP Laserjet [MODEL].”
(See top of the page for the printer model.)
Select the right model.
Click:”OK.”
Step 7.
If you like change the name to something more memorable.
Click: “Add” and Enjoy.
As always don’t hesitate to ask for help at your local CIC team office.
